基础
[Api 文档](http://www.cocos2d-x.org/docs/api-ref/index.html)
cocos2d-x 基础系列 (09) 将cocos2d-x导入到Qt creator工程中
http://blog.csdn.net/WAN_EXE/article/details/67634615
基础使用
http://docs.cocos.com/cocos2d-x/manual/zh/
- 概念
屏幕原点
在左下角,(白鹭是在左上角)FrameSize、WinSize、VisibleSize、VisibleOrigin
http://blog.csdn.net/monzart7an/article/details/19357893
- FrameSize就是屏幕的实际分辨率,这是不变的,比如我用的盖世三的手机分辨率为1280x720,这就是盖世三的FrameSize。
- WinSize就是设计分辨率,相当于游戏设计的逻辑大小,可以这样理解,上面的FrameSize就是画框,这里的WinSize就是画布。
- VisibleSize就是画布显示在画框中的部分,注意:它的大小是用WinSize来表示的。
VisibleOrigin就是VisibleSize在画框中的左下角坐标点,注意也是用WinSize来表示的。
比如:
FrameSize:假设为width = 720, height = 420
WinSize:假设为width = 360, height = 240
在kResolutionNoBorder模式下,实例图像如下:

此时的VisibleSize就是HIKJ,此时的VisibleSize为Width = 360, height = 210。
因为FrameSize的长宽比为 720 :420 = 360 :210,而我们的设计分辨率为 360 :240,所以在kResolutionNoBorder模式下,被画框截下来的设计分辨率
就为360:210
此时的VisibleOrigin就是在VisibleSize中的K,坐标为(0,15),右图中可以看出 15 = (240-210)/2
Action
移动到MoveTo,相对移动了MoveBy,移动回reverse(Sequence也可以reverse)
MoveTo::create(2, Vec2(40,40));
MoveBy::create(2, Vec2(80,80));
actionBy->reverse();
旋转RotateTo,RotateBy,缩放ScaleTo,ScaleBy,挤压SkewTo,SkewBy
跳跃JumpTo,JumpBy
JumpTo::create(2, Vec2(300,300), 50, 4);
JumpBy::create(2, Vec2(300,0), 50, 4);
贝塞尔曲线移动BezierTo,BezierBy
ccBezierConfig bezier;
bezier.controlPoint_1 = Vec2(0, s.height/2);
bezier.controlPoint_2 = Vec2(300, -s.height/2);
bezier.endPosition = Vec2(300,100);
BezierBy::create(3, bezier);
闪烁Blink
Blink::create(2, 10);淡入淡出FadeIn,FadeOut
染色TintTo,TintBy
帧动画Animate
auto animation = Animation::create();
for( int i=1;i<15;i++)
{
    char szName[100] = {0};
    sprintf(szName, "Images/grossini_dance_%02d.png", i);
    animation->addSpriteFrameWithFile(szName);
}
auto action = Animate::create(animation);

auto cache = AnimationCache::getInstance();
cache->addAnimationsWithFile("animations/animations-2.plist");
auto animation = cache->getAnimation("dance_1");
auto action = Animate::create(animation);

auto animation = animation2->clone();
序列动画Sequence,回调,内回调
auto action = Sequence::create(MoveBy::create( 2, Vec2(240,0)),RotateBy::create( 2,  540),nullptr);
auto action = Sequence::create(
                        MoveBy::create(2, Vec2(200,0)),
                        CallFunc::create( std::bind(&ActionCallFunction::callback, this) ),
                        CallFunc::create(
                             // lambda
                             [&](){
                                 auto s = Director::getInstance()->getWinSize();
                                 auto label = Label::createWithTTF("called:lambda callback", "fonts/Marker Felt.ttf", 16.0f);
                                 label->setPosition(s.width/4*1,s.height/2-40);
                                 this->addChild(label);
                             }  ),
                        nullptr);
延时DelayTime
DelayTime::create(1);重复动画RepeatForever,Repeat
RepeatForever::create(seq);
Repeat::create( seq->clone(), 10);
显示隐藏切换ToggleVisibility,隐藏Hide
翻牌效果OrbitCamera
Director::getInstance()->setProjection(Director::Projection::_2D);
auto orbit3 = OrbitCamera::create(2,1, 0, 0, 180, 90, 0);
auto action3 = Sequence::create(orbit3,orbit3->reverse(),nullptr);
镜头跟随Follow
auto s = Director::getInstance()->getWinSize();
this->runAction(Follow::create(target, Rect(0, 0, s.width * 2 - 100, s.height)));
绑定动作到一个对象,即使这个动作被放到其他对象的动画序列中,也会只作用到绑定的对象(期间,其他对象停止动作,等绑定对象播放完成)TargetedAction
auto jump1 = JumpBy::create(2,Vec2::ZERO,100,3);
auto jump2 = jump1->clone();
auto t1 = TargetedAction::create(target1, jump2);
auto seq = Sequence::create(jump1, t1, nullptr);
快进快退EaseIn,EaseOut,EaseInOut,EaseExponentialIn,EaseExponentialOut,EaseExponentialInOut,EaseSineIn,EaseSineOut,EaseSineInOut,弹性EaseElasticIn,EaseElasticOut,EaseElasticInOut
掉落弹跳效果EaseBounceIn,EaseBounceOut,EaseBounceInOut,EaseBackIn,EaseBackOut,EaseBackInOut
EaseBezierAction,二次方EaseQuadraticActionIn,EaseQuadraticActionOut,EaseQuadraticActionInOut
四次方EaseQuarticActionIn,EaseQuarticActionOut,EaseQuarticActionInOut
五次方EaseQuinticActionIn,EaseQuinticActionOut,EaseQuinticActionInOut
EaseCircleActionIn,EaseCircleActionOut,EaseCircleActionInOut
EaseCubicActionIn,EaseCubicActionOut,EaseCubicActionInOut
EaseIn::create(move->clone(), 2.5f);
EaseOut::create(move->clone(), 2.5f);可调速度的动画Speed
auto action = Speed::create(RepeatForever::create(spawn), 1.0f);
action->setSpeed( CCRANDOM_MINUS1_1() * 2 );
Progress
顺时针逆时针旋转进度
auto to = Sequence::createWithTwoActions(ProgressTo::create(2, 100), ProgressTo::create(0, 0));
auto left = ProgressTimer::create(Sprite::create(s_pathSister1));
left->setType( ProgressTimer::Type::RADIAL );
left->setReverseProgress(true);// 逆时针
left->runAction( RepeatForever::create(to));
水平进度
left->setType(ProgressTimer::Type::BAR);
left->setMidpoint(Vec2(0,0));// 左到右
left->setMidpoint(Vec2(1,0));// 右到左
left->setBarChangeRate(Vec2(1, 0));//水平
垂直进度
left->setType(ProgressTimer::Type::BAR);
left->setMidpoint(Vec2(0,0));// 上到下
left->setMidpoint(Vec2(0,1));// 下到上
left->setBarChangeRate(Vec2(0, 1));// 垂直
中间到两边的进度
left->setMidpoint(Vec2(0.5f, 0.5f));ActionManager
给target对象加action动作,true表示暂停动作
Director::getInstance()->getActionManager()->addAction(action, target, true);暂停target对象的全部动作
Director::getInstance()->getActionManager()->pauseTarget(target);恢复播放target对象的全部动作
Director::getInstance()->getActionManager()->resumeTarget(target);根据Tag停止动画
target->stopActionByTag(kTagSequence);
target->stopAllActionsByTag(kTagSequence);
根据Flag停止动画
target->stopActionsByFlags(kMoveFlag | kScaleFlag);Configuration
加载Configuration文件
Configuration::getInstance()->loadConfigFile("configs/config-test-ok.plist");
std::string configInfo = Configuration::getInstance()->getInfo();
获取内容
Configuration::getInstance()->getValue("cocos2d.x.version").asString();给默认值
std::string c_value = Configuration::getInstance()->getValue("invalid.key", Value("no key")).asString();
bool b_value = Configuration::getInstance()->getValue("invalid.key", Value(true)).asBool();
手工设置值
Configuration *conf = Configuration::getInstance();
conf->setValue("this.is.an.int.value", Value(10) );
conf->setValue("this.is.a.bool.value", Value(true) );
conf->setValue("this.is.a.string.value", Value("hello world") );
手机文件上传,参考ConsoleTest.cpp的ConsoleUploadFile例子
获取手机当前语言
LanguageType currentLanguageType = Application::getInstance()->getCurrentLanguage();
switch (currentLanguageType)
{
case LanguageType::ENGLISH:
case LanguageType::CHINESE:
}
全景环绕效果,参考CocosStudio3DTests.cpp的CSSceneSkyBoxTest例子
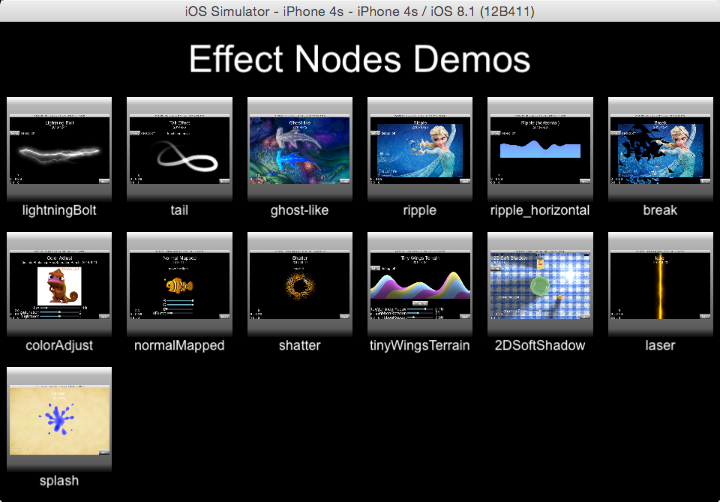
特效Effect,类似action,可以加到Sequence中
Shaky3D、Waves3D、FlipX3D、FlipY3D、Lens3D、Ripple3D、Liquid、Waves、Twirl、ShakyTiles3D
ShatteredTiles3D、ShuffleTiles、FadeOutTRTiles、FadeOutBLTiles、FadeOutUpTiles、FadeOutDownTiles
TurnOffTiles、WavesTiles3D、JumpTiles3D、SplitRows、SplitCols、PageTurn3D、
文件处理FileUtils
文件搜索路径
auto sharedFileUtils = FileUtils::getInstance();
sharedFileUtils->purgeCachedEntries();
std::vector<std::string> searchPaths = sharedFileUtils->getSearchPaths();// 获取搜索路径
searchPaths.insert(searchPaths.begin(),   "Misc");// 增加搜索路径
sharedFileUtils->setSearchPaths(searchPaths);
文件完整路径
auto filename = StringUtils::format("test%d.txt", 1);
std::string ret = sharedFileUtils->fullPathForFilename(filename);
写文件
std::string writablePath = sharedFileUtils->getWritablePath();// 获取可写路径
std::string fileName = writablePath+"external.txt";
char szBuf[100] = "Hello Cocos2d-x!";
FILE* fp = fopen(fileName.c_str(), "wb");
if (fp)
{
    size_t ret = fwrite(szBuf, 1, strlen(szBuf), fp);
    CCASSERT(ret != 0, "fwrite function returned zero value");
    fclose(fp);
    if (ret != 0)
        log("Writing file to writable path succeed.");
}
searchPaths.insert(searchPaths.begin(), writablePath);// 增加搜索路径
sharedFileUtils->setSearchPaths(searchPaths);
设置文件查找数据字典
auto sharedFileUtils = FileUtils::getInstance();
ValueMap dict;
dict["grossini"] = Value("Images/grossini.png");
sharedFileUtils->setFilenameLookupDictionary(dict);// 设置字典
auto sprite = Sprite::create("grossini");// 通过grossini, 获取 grossini.png图片
this->addChild(sprite);
文件是否存在
FileUtils::getInstance()->isFileExist("Images/grossini.png");目录是否存在
FileUtils::getInstance()->isDirectoryExist("Images");文件大小
long size = FileUtils::getInstance()->getFileSize("Images/grossini.png");文件重命名
FileUtils::getInstance()->renameFile(sharedFileUtils->getWritablePath(), "filename", "filename2");删除文件
FileUtils::getInstance()->removeFile("Images/grossini.png");新建目录
FileUtils::getInstance()->createDirectory("Images");删除目录
FileUtils::getInstance()->removeDirectory("Images");字典转plist文件
auto root = __Dictionary::create();
auto string = __String::create("string element value");
root->setObject(string, "string element key");
auto array = __Array::create();
array->addObject(__String::create("string in array"));
root->setObject(array, "array");
std::string fullPath = FileUtils::getInstance()->getWritablePath() + "text.plist";
root->writeToFile(fullPath.c_str());

ValueMap valueMap;
FileUtils::getInstance()->writeValueMapToFile(valueMap, fullPath.c_str());

ValueVector array;
FileUtils::getInstance()->writeValueVectorToFile(array, fullPath.c_str())
从plist读到字典
auto loadDict = __Dictionary::createWithContentsOfFile(fullPath.c_str());
ValueMap readValueMap = FileUtils::getInstance()->getValueMapFromFile(fullPath.c_str());
ValueVector readArray = FileUtils::getInstance()->getValueVectorFromFile(fullPath.c_str());
写字符串到文件
FileUtils::getInstance()->writeStringToFile("test test test", fullPath.c_str());
Data writeData;
writeData.copy((unsigned char *)writeDataStr.c_str(), writeDataStr.size());
FileUtils::getInstance()->writeDataToFile(writeData, fullPath.c_str());
从文件读字符串
std::string readDataStr = FileUtils::getInstance()->getStringFromFile(fullPath);Node-Clipping
普通剪切
auto clipper = ClippingNode::create();// 剪切
clipper->setContentSize(  Size(200, 200) );
clipper->setAnchorPoint(  Vec2(0.5, 0.5) );
clipper->setPosition(this->getContentSize().width / 2, this->getContentSize().height / 2);
auto stencil = DrawNode::create();// 剪切模板
Vec2 rectangle[4];
rectangle[0] = Vec2(0, 0);
rectangle[1] = Vec2(clipper->getContentSize().width, 0);
rectangle[2] = Vec2(clipper->getContentSize().width, clipper->getContentSize().height);
rectangle[3] = Vec2(0, clipper->getContentSize().height);
Color4F white(1, 1, 1, 1);
stencil->drawPolygon(rectangle, 4, white, 1, white);
clipper->setStencil(stencil);
auto content = Sprite::create(s_back2);// 剪切内容
content->setAnchorPoint(  Vec2(0.5, 0.5) );
content->setPosition(clipper->getContentSize().width / 2, clipper->getContentSize().height / 2);
clipper->addChild(content);
this->addChild(clipper);
枪眼,参考HoleDemo
MotionStreak拖尾效果
{
    streak = MotionStreak::create(2, 3, 32, Color3B::GREEN, "Images/streak.png");
    addChild(streak);
    schedule(CC_SCHEDULE_SELECTOR(MotionStreakTest1::onUpdate));// 实时更新streak的位置到target对象
}
void MotionStreakTest1::onUpdate(float delta)
{
    streak->setPosition( _target->convertToWorldSpace(Vec2::ZERO) );
}
视差Parallax,前中后景
auto cocosImage = Sprite::create(s_Power);// 前景
auto tilemap = TileMapAtlas::create("TileMaps/tiles.png", "TileMaps/levelmap.tga", 16, 16);// 中景tile地图
tilemap->releaseMap();
tilemap->getTexture()->setAntiAliasTexParameters();// 处理抗锯齿
auto background = Sprite::create(s_back);// 后景
auto voidNode = ParallaxNode::create();// 视差Parallax父对象
// background image is moved at a ratio of 0.4x, 0.5y
voidNode->addChild(background, -1, Vec2(0.4f,0.5f), Vec2::ZERO);
// tiles are moved at a ratio of 2.2x, 1.0y
voidNode->addChild(tilemap, 1, Vec2(2.2f,1.0f), Vec2(0,-200) );
// top image is moved at a ratio of 3.0x, 2.5y
voidNode->addChild(cocosImage, 2, Vec2(3.0f,2.5f), Vec2(200,800) );
addChild( voidNode );
SpritePolygon性能提升,明区域全部不用塞给GPU渲染
auto spp = Sprite::create(AutoPolygon::generatePolygon("Images/grossini.png"));快速cocos2d::experimental::TMXTiledMap
9点ui精灵
ui::Scale9Sprite *sprite = ui::Scale9Sprite::create("cocosui/animationbuttonnormal.png");UIScrollView
可以嵌套UIScrollView
可以旋转45°滑动
可以隐藏滚动条
时间轴Scheduler,可以加快或减慢全局或某些对象的时间流逝速度
auto defaultScheduler = Director::getInstance()->getScheduler();// 系统默认时间轴
Scheduler sched1 = new (std::nothrow) Scheduler();// 新时间轴
defaultScheduler->scheduleUpdate(sched1, 0, false);// 绑定到系统时间轴
ActionManager actionManager1 = new (std::nothrow) ActionManager();// 新动作管理器
sched1->scheduleUpdate(actionManager1, 0, false);// 绑定新动作管理器到新时间轴
auto sprite = Sprite::create("Images/grossinis_sister1.png");
// IMPORTANT: Set the actionManager running any action
sprite->setActionManager(actionManager1);// 绑定对象到新时间轴
sched1->setTimeScale(1.5f);// 调整时间流失速度倍数,1.5为原来速度的1.5倍
纹理设置成Mipmap的,在缩放对象时不会有锯齿
auto texture0 = Director::getInstance()->getTextureCache()->addImage("Images/grossini_dance_atlas.png");
texture0->generateMipmap();
Texture2D::TexParams texParams = { GL_LINEAR_MIPMAP_LINEAR, GL_LINEAR, GL_CLAMP_TO_EDGE, GL_CLAMP_TO_EDGE };
texture0->setTexParameters(texParams);
auto img0 = Sprite::createWithTexture(texture0);
纹理解密
// Load the encrypted atlas
// 1) Set the encryption keys or step 2 will fail
// In this case the encryption key 0xaaaaaaaabbbbbbbbccccccccdddddddd is
// split into four parts. See the header docs for more information.
ZipUtils::setPvrEncryptionKeyPart(0, 0xaaaaaaaa);
ZipUtils::setPvrEncryptionKeyPart(1, 0xbbbbbbbb);
ZipUtils::setPvrEncryptionKeyPart(2, 0xcccccccc);
ZipUtils::setPvrEncryptionKeyPart(3, 0xdddddddd);
// Alternatively, you can call the function that accepts the key in a single
// function call.
// This is slightly less secure because the entire key is more easily
// found in the compiled source. See the header docs for more information.
// ZipUtils::ccSetPvrEncryptionKey(0xaaaaaaaa, 0xbbbbbbbb, 0xcccccccc, 0xdddddddd);
// 2) Load the encrypted atlas
SpriteFrameCache::getInstance()->addSpriteFramesWithFile("Images/encryptedAtlas.plist", "Images/encryptedAtlas.pvr.ccz");
// 3) Create a sprite from the encrypted atlas
auto encryptedSprite = Sprite::createWithSpriteFrameName("powered.png");
时刻改变的Label使用LabelAtalas,性能提高10帧左右,特别是记录子弹数量的
autorelease release 的使用
错误使用:
auto obj = Node::create();
obj->autorelease(); //错误:create()已经内部调用过autorelease了

auto obj = Node::create();
obj->release(); //错误:已经被autolease过了
正确使用:
auto obj = Node::create(); // 包含了 new Node(); autorelease(); new 和 autorelease 应该成对
obj->retain();
obj->autorelease(); // retain和autorelease成对

auto obj = Node::create();
obj->retain();
obj->release(); // release和retain成对
打印日志
不支持中文打印日志
string a = "aaaa";
log("show:%s", a.c_str());
触摸事件
//  Create a "one by one" touch event listener
// (processes one touch at a time)
auto listener1 = EventListenerTouchOneByOne::create();

// 事件的吞没
// When "swallow touches" is true, then returning 'true' from the
// onTouchBegan method will "swallow" the touch event, preventing
// other listeners from using it.
listener1->setSwallowTouches(true);

// trigger when you push down
listener1->onTouchBegan = [](Touch* touch, Event* event){
    // your code
    return true; // if you are consuming it
};
// listener1->onTouchesBegan = CC_CALLBACK_2(Layer::onTouchesBegan, this);

// trigger when moving touch
listener1->onTouchMoved = [](Touch* touch, Event* event){
    // your code
};
// listener1->onTouchMoved = CC_CALLBACK_2(Layer::onTouchMoved, this);

// trigger when you let up
listener1->onTouchEnded = [=](Touch* touch, Event* event){
    // your code
};
// listener1->onTouchEnded = CC_CALLBACK_2(Layer::onTouchEnded, this);

// Add listener
_eventDispatcher->addEventListenerWithSceneGraphPriority(listener1, this);
// 全局事件
Director::getInstance()->getEventDispatcher()->addEventListenerWithSceneGraphPriority(listener1, this);

// Remove listener
_eventDispatcher->removeEventListener(m_listener1);
// 全局事件必须在析构时移除监听
Director::getInstance()->getEventDispatcher()->removeEventListener(m_listener1);
定制事件
观察者模式NotificationCenter已被弃用,被定制事件替代
- 监听器
新建监听器
_listener = EventListenerCustom::create("game_custom_event1", [=](EventCustom* event){
    std::string str("Custom event 1 received, ");
    char* buf = static_cast<char*>(event->getUserData()); // 获取事件携带的数据
    str += buf;
    str += " times";
    statusLabel->setString(str.c_str());
});

_eventDispatcher->addEventListenerWithFixedPriority(_listener, 1); // 注册监听器
事件分发
static int count = 0;
++count;

char* buf = new char[10];
sprintf(buf, "%d", count);

//新建自定义事件
EventCustom event("game_custom_event1");
event.setUserData(buf); //添加自定义数据到事件中

// 分发事件
_eventDispatcher->dispatchEvent(&event);

CC_SAFE_DELETE_ARRAY(buf);
* 删除事件监听器

    _eventDispatcher->removeEventListener(_listener);
图集
加载图集
// load the Sprite Sheet
auto spritecache = SpriteFrameCache::getInstance();

// the .plist file can be generated with any of the tools mentioned below
spritecache->addSpriteFramesWithFile("sprites.plist");
创建图集
Texture Packer https://www.codeandweb.com/texturepacker
Zwoptex https://www.zwopple.com/zwoptex/
ShoeBox http://renderhjs.net/shoebox/
Sprite Sheet Packer http://amakaseev.github.io/sprite-sheet-packer/
使用精灵缓存
// Our .plist file has names for each of the sprites in it.  We'll grab
// the sprite named, "mysprite" from the sprite sheet:
auto mysprite = Sprite::createWithSpriteFrameName("mysprite.png");

// this is equivalent to the previous example,
// but it is created by retrieving the SpriteFrame from the cache.
auto newspriteFrame = SpriteFrameCache::getInstance()->getSpriteFrameByName("Blue_Front1.png");
auto newSprite = Sprite::createWithSpriteFrame(newspriteFrame);
日期时间获取
获取时间毫秒方法,windows下tv_sec获取秒数有问题,需要改成time(×ec)方法
// 获取当前本地毫秒 int64_t TimeUtil::currentTimeMillis() { time_t timesec; struct timeval now; gettimeofday(&now, NULL); #if (CC_TARGET_PLATFORM == CC_PLATFORM_WIN32 || CC_TARGET_PLATFORM == CC_PLATFORM_WINRT) time(×ec); #else timesec = now.tv_sec; #endif int64_t when = timesec * 1000LL + now.tv_usec / 1000; return when; }对比两个时间,切记调用localtime后会冲掉前面调用localtime的返回值,两个指针指向相同地址了!!!!!!!!!!!!!!!
int TimeUtil::CpTwoDay(time_t time1, time_t time2)
{
    tm *pTmp1 = localtime(&time1);
    // 切记要保存这次的时间到单独变量中
    int tm_year1 = pTmp1->tm_year;
    int tm_mon1 = pTmp1->tm_mon;
    int tm_mday1 = pTmp1->tm_mday;
    // 这次调用会使pTmp1和pTmp2指针相同了!!!!!!!!!!
    tm *pTmp2 = localtime(&time2);
}
简单使用
LayerColor
LayerColor * startBar = LayerColor::create(Color4B(0, 0, 0, 200), REAL_WINSIZE_W, 50);
startBar->setPosition(0, REAL_WINSIZE_H * 1.0 / 4.0);
addChild(startBar, 100000000);
LabelBMFont
LabelBMFont* m_txtLabel = LabelBMFont::create("Start", "fonts/font_1.fnt");
// 设置换行
m_txtLabel->setDimensions(364, 0);
// 设置行间距
m_txtLabel->setLineSpacing(5);
// 设置字体大小
m_txtLabel->setBMFontSize(22);
addChild(m_txtLabel);
实例
shader
重要!!!
- 片断着色器在coco2dx中是fsh文件
- 顶点着色器在coco2dx中是vsh文件
调试工具ShaderDesigner!!!!!超级好用
shader超多例子和效果网站!!!!!!
cocos2dx 调用代码
auto fileUtiles = FileUtils::getInstance();
auto fragmentFullPath = fileUtiles->fullPathForFilename(“filter/01.fsh”);
auto fragSource = fileUtiles->getStringFromFile(fragmentFullPath);
auto glprogram = GLProgram::createWithByteArrays(ccPositionTextureColor_noMVP_vert, fragSource.c_str());
//auto glprogram = GLProgram::createWithByteArrays(fragSource.c_str(), ccPositionTextureColor_noMVP_frag);
//auto glprogram = GLProgram::createWithFilenames(“filter/01.vsh”, “filter/01.fsh”);cocos2d::GLProgramState _glprogramstate = (glprogram == nullptr ? nullptr : GLProgramState::getOrCreateWithGLProgram(glprogram));
Scale9Sprite cover = Scale9Sprite::createWithSpriteFrameName(“button.png”);
cover->setPreferredSize(Size(REAL_WINSIZE_W, REAL_WINSIZE_H));
cover->setAnchorPoint(Vec2::ZERO);
this->addChild(cover);
cover->setGLProgramState(_glprogramstate);
cover->getGLProgramState()->setUniformVec2(“iResolution”, Vec2(cover->getTexture()->getContentSizeInPixels().width, cover->getTexture()->getContentSizeInPixels().height));
BlendFunc cbl = { GL_ONE , GL_ONE };
cover->setBlendFunc(cbl);
Shader
Cocos2d-x 使用的着色器语言是 OpenGL ES Shading Language v1.0
着色器 (英语:shader)应用于计算机图形学领域,指一组供计算机图形资源在执行渲染任务时使用的指令。
opengl es的着色器 有.fsh和.vsh两个文件 这两个文件在被编译和链接后就可以产生可执行程序 与GPU交互
.vsh 是顶点shader 用与顶点计算 可以理解控制顶点的位置 在这个文件中我们通常会传入当前顶点的位置,和纹理的坐标.GLSL - OpenGL Shading Language 也称作 GLslang,是一个以C语言为基础的高阶着色语言。它是由 OpenGL ARB 所建立,提供开发者对绘图管线更多的直接控制,而无需使用汇编语言或硬件规格语言。
Shader实例解析
http://blog.csdn.net/column/details/13503.html
http://imgtec.eetrend.com/blog/7968
http://www.cnblogs.com/beeasy/p/5047000.html
http://caiwb1990.iteye.com/blog/2064688
ocos2d-x 滤镜对 dragonbones 的支持(包含模糊、灰度、高亮、曝光等特效)
使用Android Studio 进行cocos2d-x开发入门全攻略
http://blog.csdn.net/Marine_snow/article/details/71403702

点setup.py会跳出一个命令行窗口要求你输入SDK,NDK和ANT的路径,直接把对应的文件
资源文件的加密和解密
http://blog.csdn.net/stevenkylelee/article/details/44920517

可以对1字节,2字节,4字节的数据,用某个数进行异或运算来加密。
异或的特性是,用数A对内容B进行异或得到内容C,再用数A对内容C异或可以得到内容B。
这个特性可以被用来加密。同时,数A的作用就是密钥了。
浮动位置文件的异或加密解密速度最快(512 MB 的数据每 4 字节一次异或也才用了 327 毫秒,每 2 字节一次异或 655 毫秒,每字节也才 1.2 秒)

解密位置

    cocos\platform\CCFileUtils.cpp

    FileUtils::Status FileUtils::getContents(const std::string& filename, ResizableBuffer* buffer)方法里增加解密算法

    #include <stdio.h>
    #include <stdlib.h>
    #include <string.h>

    #define KEY 0x86

    int main()
    {
        char p_data[16] = {"Hello World!"};
        char Encrypt[16]={0},Decode[16]={0};
        int i;

        for(i = 0; i < strlen(p_data); i++)
        {
        Encrypt[i] = p_data[i] ^ KEY;
        }

        for(i = 0; i < strlen(Encrypt); i++)
        {
        Decode[i] = Encrypt[i] ^ KEY;
        }

        printf("Initial date:  %s\n",p_data);
        printf("Encrypt date:  %s\n",Encrypt);
        printf("Decode date:  %s\n",Decode);

        return 0;
    }

加密解密还支持多重加密,但是要记得加密的次数,解密时运用相同密钥做解密操作相同次数即可。不仅如此,加密解密还支持多重不同密钥加密,只要你记得加密使用密钥!

    (int)size, (unsigned char*)buffer->buffer()

    #include "stdafx.h"

    #include <stdio.h>
    #include <stdlib.h>
    #include <string.h>
    #include <iostream>
    #include <fstream>
    #include <string>
    #include <vector>
    #include <io.h>

    #define KEY 0x86

    using namespace std;

    void getFiles(string foler, vector<string>& files);
    void encodeFile(string fname);
    void decodeFile(string fname);

    int main() {
        string folder = "D:\\test";  //此处用的是斜杠,也可以用反斜
                                                                    //但需注意的是由于C语言的特点,要用双反斜杠,即"E:\\MATLAB\\LBP\\scene_categories"
                                                                    //cin >> folder;   //也可以用此段代码直接在DOS窗口输入地址,此时只需正常的单反斜杠即可

        vector<string> files;
        getFiles(folder, files);  //files为返回的文件名构成的字符串向量组

        for (int i = 0; i < files.size(); i++) {    //files.size()返回文件数量

                                                    //To do here
            cout << files[i] << endl;
            encodeFile(files[i]);
            decodeFile(files[i]);
        }
        system("pause");
        return 0;
    }

    void getFiles(string path, vector<string>& files) {
        //文件句柄
        long hFile = 0;
        //文件信息
        struct _finddata_t fileinfo;   //大家可以去查看一下_finddata结构组成
                                       //以及_findfirst和_findnext的用法,了解后妈妈就再也不用担心我以后不会编了
        string p;
        if ((hFile = _findfirst(p.assign(path).append("\\*").c_str(), &fileinfo)) != -1) {
            do {
                //如果是目录,迭代之
                //如果不是,加入列表
                if ((fileinfo.attrib & _A_SUBDIR)) {
                    if (strcmp(fileinfo.name, ".") != 0 && strcmp(fileinfo.name, "..") != 0)
                        getFiles(p.assign(path).append("\\").append(fileinfo.name), files);
                }
                else {
                    files.push_back(p.assign(path).append("\\").append(fileinfo.name));
                }
            } while (_findnext(hFile, &fileinfo) == 0); _findclose(hFile);
        }
    }

    void encodeFile(string fname) {
        filebuf *pbuf;
        ifstream filestr;
        ofstream fileout;
        long size;
        char * buffer;
        char * bufferen;
        // 要读入整个文件,必须采用二进制打开
        filestr.open(fname, ios::binary);
        fileout.open(fname + ".en", ios::binary);
        // 获取filestr对应buffer对象的指针
        pbuf = filestr.rdbuf();

        // 调用buffer对象方法获取文件大小
        size = pbuf->pubseekoff(0, ios::end, ios::in);
        pbuf->pubseekpos(0, ios::in);

        // 分配内存空间
        buffer = new char[size];
        bufferen = new char[size];

        // 获取文件内容
        pbuf->sgetn(buffer, size);

        for (long i = 0; i < size; i++)
        {
            bufferen[i] = buffer[i] ^ KEY;
        }

        // 输出到标准输出
        fileout.write(bufferen, size);

        filestr.close();
        fileout.close();

        delete[]buffer;
    }

    void decodeFile(string fname) {
        filebuf *pbuf;
        ifstream filestr;
        ofstream fileout;
        long size;
        char * buffer;
        char * bufferen;
        // 要读入整个文件,必须采用二进制打开
        filestr.open(fname + ".en", ios::binary);
        fileout.open(fname + ".png", ios::binary);
        // 获取filestr对应buffer对象的指针
        pbuf = filestr.rdbuf();

        // 调用buffer对象方法获取文件大小
        size = pbuf->pubseekoff(0, ios::end, ios::in);
        pbuf->pubseekpos(0, ios::in);

        // 分配内存空间
        buffer = new char[size];
        bufferen = new char[size];

        // 获取文件内容
        pbuf->sgetn(buffer, size);

        for (long i = 0; i < size; i++)
        {
            bufferen[i] = buffer[i] ^ KEY;
        }

        // 输出到标准输出
        fileout.write(bufferen, size);

        filestr.close();
        fileout.close();

        delete[]buffer;
    }
实战
- 新建cocos项目,如果要把自己的class也在新建项目时直接构建到cocos目录,更改文件D:\cocos2d-x-3.15\templates\cocos2dx_files.json
与墙壁碰撞,并不进入墙壁
// 获取墙壁碰撞框
Rect rect = wall->getBoundingBox();
// 判断墙壁是否与敌人圆形碰撞框碰撞
if (rect.intersectsCircle(center, radius)) {
    if (center.x >= rect.getMinX() - radius && center.x <= rect.getMinX())
    {
        vec.x = -1;// 左边碰撞
    }
    else if (center.x >= rect.getMaxX() && center.x <= rect.getMaxX() + radius)
    {
        vec.x = 1;// 右边碰撞
    }
    if (center.y >= rect.getMinY() - radius && center.y <= rect.getMinY())
    {
        vec.y = -1;// 下边碰撞
    }
    else if (center.y >= rect.getMaxY() && center.y <= rect.getMaxY() + radius)
    {
        vec.y = 1;// 上边碰撞
    }
}
// xt为敌人将要在x方向的位移,如xt>0向右移动,而vec.x<0将与墙面左方碰撞
// 则xt=0敌人x方向位移为0,不能移动到墙里
if ((xt > 0 && vec.x < 0) || (xt < 0 && vec.x > 0))
{
    xt = 0;
}
if ((yt > 0 && vec.y < 0) || (yt < 0 && vec.y > 0))
{
    yt = 0;
}
x += xt;
y += yt;

enemy->setPosition(x, y);
DragonBone 的敌人闪白效果简单实现
// 先把原来db的图片文件的所有像素都变白色,另存为新图片
// 加载这张白色图片
Director::getInstance()->getTextureCache()->addImage("animation/enemy/enemy1_tex_w.png");// 闪白资源图片
auto tex = Director::getInstance()->getTextureCache()->getTextureForKey("animation/enemy/enemy1_tex_w.png");
if (tex)
{
    m_armature->replaceTexture(tex); // 闪白
    auto call = [&]() {
        m_armature->replaceTexture(nullptr); // 恢复原来图片
    };
    auto action = Sequence::create(DelayTime::create(0.1), CallFunc::create(call), nullptr);
    runAction(action); // 播放闪白恢复动作
}
闪红效果
ccBlendFunc cbl = {GL_DST_COLOR, GL_ONE};
enemySprite->setBlendFunc(cbl);
enemySprite->setColor(ccRED);
PageTurn3D效果的代码重构
拷贝修改PageTurn3D 动作源码
PageTurnAction *PageTurnAction::clone() const
{
    // no copy constructor
    PageTurnAction *action = PageTurnAction::create(_duration, _gridSize);
    action->nextPageCallback = this->nextPageCallback;// 复制回调方法
    action->prePageCallback = this->prePageCallback;// 复制回调方法
    return action;
}

/*
 * Update each tick
 * Time is the percentage of the way through the duration
 */
void PageTurnAction::update(float time)
{
    float tt = MAX(0, time - 0.25f);
    float deltaAy = (tt * tt * 500);
    float ay = -100 - deltaAy;

    float deltaTheta = sqrtf(time);
    float theta = deltaTheta > 0.5f ? (float)M_PI_2*deltaTheta : (float)M_PI_2*(1 - deltaTheta);

    float rotateByYAxis = (2-time)* M_PI;

    if (isFirst)// 判断是否是第一次翻页
    {
        if (time > 0.5)pageTime = 1;// 上一页
        else pageTime = 0;// 下一页
        isFirst = false;
    }

    if (pageTime == 0)
    {
        if (time > 0.445) // 正好翻页到一半
        {
            pageTime = 0.445;
            if (nextPageCallback)
            {
                nextPageCallback(this->getTarget()); // 回调下一页方法,替换页面内容等
            }
        }
    }
    else if (pageTime == 1)
    {
        if (time < 0.445) // 正好翻页到一半
        {
            pageTime = 0.445;
            if (prePageCallback)
            {
                prePageCallback(this->getTarget());// 回调上一页方法,替换页面内容等
            }
        }
    }
    if (time == 1 || time == 0) isFirst = true;

    float sinTheta = sinf(theta);
    float cosTheta = cosf(theta);

    //CCLOG("this->getTarget():%d", this->getTarget()->getLocalZOrder());

    for (int i = 0; i <= _gridSize.width; ++i)
    {
        for (int j = 0; j <= _gridSize.height; ++j)
        {
            // Get original vertex
            Vec3 p = getOriginalVertex(Vec2(i ,j));

            p.x -= getGridRect().origin.x;
            float R = sqrtf((p.x * p.x) + ((p.y - ay) * (p.y - ay)));
            float r = R * sinTheta;
            float alpha = asinf( p.x / R );
            float beta = alpha / sinTheta;
            float cosBeta = cosf( beta );

            // If beta > PI then we've wrapped around the cone
            // Reduce the radius to stop these points interfering with others
            if (beta <= M_PI)
            {
                p.x = ( r * sinf(beta));
            }
            else
            {
                // Force X = 0 to stop wrapped
                // points
                p.x = 0;
            }

            p.y = ( R + ay - ( r * (1 - cosBeta) * sinTheta));

            // We scale z here to avoid the animation being
            // too much bigger than the screen due to perspective transform

            p.z = (r * ( 1 - cosBeta ) * cosTheta);// "100" didn't work for
            p.x = p.z * sinf(rotateByYAxis) + p.x * cosf(rotateByYAxis);
            p.z = p.z * cosf(rotateByYAxis) - p.x * sinf(rotateByYAxis);
            p.z/=7;
            //    Stop z coord from dropping beneath underlying page in a transition
            // issue #751
            if( p.z < 0.5f )
            {
                p.z = 0.5f;
            }

            // Set new coords
            p.x += getGridRect().origin.x;
            setVertex(Vec2(i, j), p);
        }
    }
}
具体使用新action的步骤
for (int i = 0 ; i < 15; i++)
{
    NodeGrid* _gridNodeTarget = NodeGrid::create(gridRect);
    addChild(_gridNodeTarget, -index);

    // 新建翻页动作
    pageTurnAction = PageTurnAction::create(0.5, Size(15, 10));
    CC_SAFE_RETAIN(pageTurnAction);
    pageTurnAction->nextPageCallback = CC_CALLBACK_1(HomeLayer::nextPageCallback, this);
    pageTurnAction->prePageCallback = CC_CALLBACK_1(HomeLayer::prePageCallback, this);

    // 页背景图
    auto bg2 = Sprite::create("right-0.png");
    bg2->setContentSize(Size(pageWidth, pageHeight));
    _gridNodeTarget->addChild(bg2, 1);
    bg2->setPosition(center.x + pageWidth / 2, center.y);
    // 右方页面内容图片
    auto right = Sprite::create("right-1.png");
    right->setTag(1);
    _gridNodeTarget->addChild(right, 2);
    right->setPosition(center.x + right->getContentSize().width / 2 + 50, center.y + 20);
    // 左方页面内容图片
    auto left = Sprite::create("left-1.png");
    left->setTag(2);
    left->setFlippedX(true); // 因为翻页后图片会左右反转
    left->setVisible(false);
    _gridNodeTarget->addChild(left, 2);
    left->setPosition(center.x + left->getContentSize().width / 2 + 50, center.y + 20);

    _gridNodeTargets[index] = _gridNodeTarget;
    index++;
}
下一页

    _gridNodeTargets[index]->runAction(pageTurnAction->clone());

上一页

    _gridNodeTargets[index]->runAction(pageTurnAction->reverse());

回调方法,用户替换正反页面内容的显示与否

    void HomeLayer::nextPageCallback(cocos2d::Node* node)
    {
        node->getChildByTag(1)->setVisible(false);
        node->getChildByTag(2)->setVisible(true);
    }

    void HomeLayer::prePageCallback(cocos2d::Node* node)
    {
        node->getChildByTag(2)->setVisible(false);
        node->getChildByTag(1)->setVisible(true);
    }
瓦片地图的黑线及地图抖动解决方案
cocos2d::CCFastTMXTiledMap,如果使用的是快速瓦片地图的话,办法是在创建瓦片地图的新图块的时候,将边距和间距分别设置为1像素,这样生成的tmx文件则不会产生黑线的情况。
Camera的使用
新建Camera
// 40是视野大小,一般在40-60度之间;第二个参数是宽高比;3,4分别为近平面和远平面距离,只有这两个平面之间的物体才会显示
Camera* m_camera = Camera::createPerspective(40, (GLfloat)MAP_WINSIZE_W / MAP_WINSIZE_H, 1.0f, 5000.0f);
// 摄像机的标识,所有新增的Node必须要设置这个标识,否则不可见;m_drawNode->setCameraMask(CameraFlag::USER1);
m_camera->setCameraFlag(CameraFlag::USER1);
// 摄像机的位置x,y,z
m_camera->setPosition3D(Vec3(0, 0, 1000));
// 设置镜头方向 注意,这里有个坑:camera->lookAt必须在camera->setPostion3D之后,
// 因为lookAt中有一句 Vec3::subtract(this->getPosition3D(), lookAtPos, &zaxis),
// 即相减得出相机空间z轴,使用了getPosition3D。所以必须先设定好position3D再调lookAt才能得到正确结果。
m_camera->lookAt(Vec3(0.0, 0.0, 0.0), Vec3::UNIT_Y);
// 加到Layer中 不管camera被addChild到哪个节点,其都会被添加到Scene的_cameras成员中。
// 如果Scene中任何一个节点都没有添加用户自定义相机,则scene的_cameras成员中只含有一个默认相机,
// 就是Scene::_defaultCamera所引用的相机;如果Scene中某些节点添加了用户自定义相机,
// 则_cameras[0]是默认相机,其余元素是用户相机。
this->addChild(m_camera);
触摸移动摄像机
Vec2 touchLocation = touch->getLocationInView();
Vec2 preLocation = touch->getPreviousLocationInView();
touchLocation = Director::getInstance()->convertToGL(touchLocation);
preLocation = Director::getInstance()->convertToGL(preLocation);
Vec2 diff = preLocation - touchLocation;
Vec3 eyePosOld = m_camera->getPosition3D();
Vec3 eyePos = Vec3(eyePosOld.x + diff.x, eyePosOld.y + diff.y, eyePosOld.z);
m_camera->setPosition3D(eyePos);
m_camera->lookAt(Vec3(eyePos.x, eyePos.y, eyePos.z), Vec3::UNIT_Y);
拉近放远镜头
// 其实就是修改z坐标
Vec3 eyePosOld = m_camera->getPosition3D();
eyePosOld.z += 20;
Vec3 eyePos = Vec3(eyePosOld.x, eyePosOld.y, eyePosOld.z);
m_camera->setPosition3D(eyePos);
VS2017性能调试
选择“调试”-“性能探查器”-勾选“CPU使用率”-点击“开始”
收集完毕后选择“创建详细的报告”
选择“当前视图”里面的“调用关系数”-查看占用CUP“非独占样本”百分比最多的方法
主业务逻辑循环每帧执行的时间最好在4ms以内,最多8ms以内,否则会达不到60帧
效率比较高的2d寻路算法
八方向, 返回int路径长度,pOutBuffer是返回的路径点坐标(如:宽10,高10,12表示x 2,y 1,x=12%10;y=12/10)
pMap里面的1表示可以行走,0不可行走
int PathFinders::AStarFindPathNoTieDiag(const int nStartX, const int nStartY,
       const int nTargetX, const int nTargetY,
       const unsigned char* pMap, const int nMapWidth, const int nMapHeight,
       int* pOutBuffer, const int nOutBufferSize) {

  auto idx = [nMapWidth](int x, int y) {
    return x + y*nMapWidth;
  };

  auto h = [=](int u) { // lower bound distance to target from u
    int x = u % nMapWidth, y = u / nMapWidth;
    //return max(abs(x-nTargetX), abs(y-nTargetY));
    float x1 = x - nTargetX;
    float y1 = y - nTargetY;
    float x2 = x - nStartX;
    float y2 = y - nStartY;
    return sqrt(x1*x1 + y1*y1) + sqrt(x2*x2 + y2*y2);
  };

  const int n = nMapWidth*nMapHeight;
  const int startPos = idx(nStartX, nStartY), targetPos = idx(nTargetX, nTargetY);

  ExploredNodes = 0;
  vector<int> p(n);
  vector<float> d(n, INT_MAX);
  priority_queue<pair<int, int>,
         vector<pair<int, int>>,
         greater<pair<int, int>>> pq;
  d[startPos] = 0;
  pq.push(make_pair(0 + h(startPos), startPos));
  while (!pq.empty()) {
    int u = pq.top().second; pq.pop(); ExploredNodes++;
    int es[] = { -nMapWidth - 1, -nMapWidth + 1, +nMapWidth - 1, +nMapWidth + 1,
        +1, -1, +nMapWidth, -nMapWidth };
    int idx = 0;
    for (auto e : es) {
        idx++;
      int v = u + e;
      if (((e == 1 || e == -nMapWidth+1 || e == nMapWidth+1) && (v % nMapWidth == 0))
      || ((e == -1 || e == -nMapWidth-1 || e == nMapWidth-1) && (u % nMapWidth == 0)))
    continue;
      if (0 <= v && v < n && d[v] > d[u] + 1 && pMap[v]
          // 斜线移动要特殊处理
          && ((e == -nMapWidth - 1 && pMap[u - 1] && pMap[u - nMapWidth])
              || (e == +nMapWidth - 1 && pMap[u - 1] && pMap[u + nMapWidth])
              || (e == +nMapWidth + 1 && pMap[u + 1] && pMap[u + nMapWidth])
              || (e == -nMapWidth + 1 && pMap[u + 1] && pMap[u - nMapWidth])
              || e == 1 || e == -1 || e == +nMapWidth || e == -nMapWidth)) {
    p[v] = u;
    if (idx < 5)
        d[v] = d[u] + 1.8;
    else
        d[v] = d[u] + 1;
    if (v == targetPos)
      goto end;
    pq.push(make_pair(d[v] + h(v), v));
      }
    }
  }
 end:

  if (d[targetPos] == INT_MAX) {
    return -1;
  } else if (d[targetPos] <= nOutBufferSize) {
    int curr = targetPos;
    for (int i = d[targetPos] - 1; i >= 0; i--) {
      pOutBuffer[i] = curr;
      curr = p[curr];
    }
    return d[targetPos];
  }

  return d[targetPos]; // buffer size too small
}
使用方法
int nStartX = 1, nStartY = 1, nTargetX = 8, nTargetY = 8;
int nMapWidth = 10, nMapHeight = 10;
for (int i = 0; i < nMapWidth; i++) {
    for (int j = 0; j < nMapHeight; j++) {
        pMap[nMapWidth*i + j] = int(rand()*10)%2; // 随机地图
    }
}
int pOutBuffer[1000] = { 0 };
int dist = AStarFindPathNoTieDiag(nStartX, nStartY, nTargetX, nTargetY, pMap, nMapWidth, nMapHeight, pOutBuffer, 1000);

string log1 = "";
for (size_t j = 0; j < nMapHeight; j++)
{
    for (size_t i = 0; i < nMapWidth; i++)
    {
        if (i == 0)
        {
            log1 = GETMYSTR("%s \n", log1.c_str());
        }
        bool finded = false;
        for (int t = 0; t < dist; t++) {
            if (output[t] == nMapHeight*j + i)
            {
                log1 = GETMYSTR("%s %4d", log1.c_str(), output[t]);
                finded = true;
                break;
            }
        }
        if (!finded)
        {
            log1 = GETMYSTR("%s %4d", log1.c_str(), pMap[nMapHeight*j + i]);
        }

    }
}
GMLog("%s", log1.c_str());
摄像头的使用,和FastTMXTiledMap裁剪
Node::setCameraMask(unsigned short mask, bool applyChildren)
用来指定cameraMask,其第二个参数用来指明子节点是否递归地使用相同的mask,默认为true。要特别注意:node->setCameraMask(mask,true)只能使node的当前所有子节点的cameraMask设置为mask,但在此之后新添加的子节点则不会受影响(仍然是默认camera),需要记着手动进行设置,这里很容易被坑。又比如在Layer::init()里开头写了一句this->setCameraMask(mask,true)紧接着加了些子节点,那么要意识到这些子节点是不会被设置的,要么对每个子节点都手动调一次setCameraMask,要不就把this->setCameraMask写到init函数的末尾。
m_midGround = TiledMap::create("maps1.tmx");
m_midGround->setCameraMask(2); // 2与CameraFlag::USER1对应
TiledMap中的Layer不能使用下面方法,否则此layer不会被裁剪!!!!!!!!!
Sprite *tile = layer->getTileAt(tileCoord);修改z缩放新摄像头,需要修改TMXLayer::draw源代码,让裁剪与缩放同步
void TMXLayer::draw(Renderer *renderer, const Mat4& transform, uint32_t flags)

把这句

Size s = Director::getInstance()->getVisibleSize();

修改为

float scaleZ = Camera::getVisitingCamera()->getPositionZ() / 1000;
Size s = Director::getInstance()->getVisibleSize() * scaleZ;

保证裁剪矩形等比缩放即可
cocos2dx Fadein FadeOut 设置透明度 无效
this->getParent()->setCascadeOpacityEnabled(true); // 增加这句就好
this->setCascadeOpacityEnabled(true); // 增加这句就好
auto action = Sequence::create(Spawn::create(FadeOut::create(0.5), MoveBy::create(0.5, Vec2(ax, ay)),RotateBy::create(0.5, 360 * rot * rot1), nullptr), DelayTime::create(0.1), CallFunc::create(callf), nullptr);
this->runAction(action);
MotionStreak在加速时,拖尾路径不精确问题
当加速整个游戏的速度时,会导致拖尾问题
Director::sharedDirector()->getScheduler()->setTimeScale(3.0f); // 3倍速在调度里增加update即可解决
m_streak->update(dt);shader简单使用
auto fileUtiles = FileUtils::getInstance();
auto fragmentFullPath = fileUtiles->fullPathForFilename("example_Noisy.fsh");
auto fragSource = fileUtiles->getStringFromFile(fragmentFullPath);
auto glprogram = GLProgram::createWithByteArrays(ccPositionTextureColor_noMVP_vert, fragSource.c_str());

cocos2d::GLProgramState* _glprogramstate = (glprogram == nullptr ? nullptr : GLProgramState::getOrCreateWithGLProgram(glprogram));
Sprite * cover = Sprite::createWithSpriteFrameName("bg.png");
cover->setPreferredSize(Size(REAL_WINSIZE_W, REAL_WINSIZE_H));
this->addChild(cover);
cover->setGLProgramState(_glprogramstate);
cover->getGLProgramState()->setUniformVec2("resolution", Vec2(cover->getTexture()->getContentSizeInPixels().width, cover->getTexture()->getContentSizeInPixels().height));
BlendFunc cbl = { GL_ONE  , GL_ONE }; // 半透明
cover->setBlendFunc(cbl);
dragonBone 使用
加载资源
dragonBones::CCFactory::getFactory()->loadDragonBonesData(filePath);
dragonBones::CCFactory::getFactory()->loadTextureAtlasData(filePath);
构建
dragonBones::Armature* m_armature = dragonBones::CCFactory::getFactory()->buildArmature(armatureName, dragonBonesName, skinName, textureAtlasName);
dragonBones::CCArmatureDisplay* m_armatureDisplay = static_cast<dragonBones::CCArmatureDisplay*>(m_armature->getDisplay());
addChild(m_armatureDisplay);
播放动画
m_armatureDisplay->getArmature()->getAnimation()->play("wait");动画事件
m_armatureDisplay->getEventDispatcher()->setEnabled(true);// 必须有这个,否则不会收到事件
m_armatureDisplay->getEventDispatcher()->addCustomEventListener(dragonBones::EventObject::LOOP_COMPLETE, std::bind(&XXXXX::animationEventHandler, this, std::placeholders::_1));

void XXXXX::animationEventHandler(cocos2d::EventCustom * event)
{
    const auto eventObject = (dragonBones::EventObject*)event->getUserData();
    if (eventObject->type == dragonBones::EventObject::LOOP_COMPLETE)
    {
        int a = 0;
    }
}
帧事件
m_armatureDisplay->getEventDispatcher()->setEnabled(true);
m_armatureDisplay->getEventDispatcher()->addCustomEventListener(dragonBones::EventObject::FRAME_EVENT, std::bind(&XXXXX::frameEventHandler, this, std::placeholders::_1));

void XXXXX::frameEventHandler(cocos2d::EventCustom* event)
{
    const auto eventObject = (dragonBones::EventObject*)event->getUserData();
    if (eventObject->name.find("start") != string::npos)
    {
        int a = 0;
    }
    else if (eventObject->name.find("end") != string::npos)
    {
        int a = 0;
    }
}
!!!!!!!!!帧事件动画事件回调问题!!!!!!!!!!!!!!!!!!!!
在销毁时一定要先销毁Listener
    m_armatureDisplay->getEventDispatcher()->removeAllEventListeners();
并且确定会销毁对象,否则会导致还会进入事件回调方法中
clock调度,只有在调度里调用了才会播放动画,否则会停留在第一帧
dragonBones::WorldClock::clock.add(m_armatureDisplay->getArmature());

dragonBones::WorldClock::clock.advanceTime(dt);
或者调用动画自己的time
m_armatureDisplay->getArmature()->advanceTime(dt);Label 使用
修改Label内某个字的颜色
Label* label = Label::createWithBMFont("ui/fonts/font_1.fnt", "ABX:100");
std::u32string changeString = U"0123456789"; // 匹配数字字符,都改成黄色
std::u32string txt;
StringUtils::UTF8ToUTF32(label->getString(), txt); // 获取label的内容,是u32string类型的
for (int i = 0; i < txt.length(); i++)
{
    Sprite* letter = (Sprite*)label->getLetter(i); // 获取每一个字符的Sprite,包括中文字
    if (!letter)
    {
        continue;
    }
    char32_t n = txt.at(i); // 获取字符,是char32_t类型的
    std::size_t found = changeString.find(n);
    if (found != std::string::npos)
    {
        letter->setColor(Color3B::RED); // 匹配的数字改为红色
    }
    else {
        letter->setColor(label->getColor());
    }
}
不定参数使用实例
void XXXX::setLabel(Label* label, int colorNum, Color3B defaultColor, ...)
{
    std::u32string matchFirst;
    Color3B color;
    std::vector<std::u32string> matchFirsts;
    std::vector<Color3B> colors;
    va_list ap; // 定义不定参数指针
    va_start(ap, defaultColor); // 指针移动到defaultColor
    while (colorNum--) { // 根据colorNum的值判断共有多少不定参数
        matchFirst = va_arg(ap, char32_t*); // u32string类型参数必须使用char32_t*方式获取,否则报错!!!!!!!!!!!!!!!!!!!
        matchFirsts.push_back(matchFirst);
        color = va_arg(ap, Color3B);
        colors.push_back(color);
    }

    std::u32string txt;
    StringUtils::UTF8ToUTF32(label->getString(), txt);
    bool isFirst = true;
    for (int i = 0; i < txt.length(); i++)
    {
        Sprite* letter = (Sprite*)label->getLetter(i);
        char32_t n = txt.at(i);
        if (n == '\n')
        {
            isFirst = true;
            continue;
        }
        if (!letter)
        {
            continue;
        }
        if (isFirst)
        {
            color = defaultColor;
            if (n == ' ') n = txt.at(i + 1);
            for (int j = 0; j < matchFirsts.size(); j++)
            {
                std::size_t found = matchFirsts[j].find(n);
                if (found != std::string::npos)
                {
                    color = colors.at(j);
                    break;
                }
            }
            isFirst = false;
        }

        letter->setColor(color);
    }
    va_end(ap); // 释放指针
}
POD问题!!!!!!!!!!!!!!!!!!!!!!!!!!!!!!!!!!!
color = va_arg(ap, Color3B);
Color3B并不是POD类型,特别是在ios上编译时会报POD错误!!!!!

POD全称Plain Old Data。
通俗的讲,一个类或结构体通过二进制拷贝后还能保持其数据不变,那么它就是一个POD类型。

平凡的定义
    1.有平凡的构造函数
    2.有平凡的拷贝构造函数
    3.有平凡的移动构造函数
    4.有平凡的拷贝赋值运算符
    5.有平凡的移动赋值运算符
    6.有平凡的析构函数
    7.不能包含虚函数
    8.不能包含虚基类

标准布局的定义
    1.所有非静态成员有相同的访问权限
    2.继承树中最多只能有一个类有非静态数据成员
    3.子类的第一个非静态成员不可以是基类类型
    4.没有虚函数
    5.没有虚基类
    6.所有非静态成员都符合标准布局类型

当一个数据类型满足了”平凡的定义“和”标准布局“,我们则认为它是一个POD数据。
- 预定义头
COCOS2D_DEBUG=2
设置调试级别,在VS-属性-配置属性-C/C++-预处理器-预处理器定义,里面进行设置
- win32 pc端发布
只能发布release模式,debug模式发布后无法找到合适的vc++运行库
配置release模式
点击项目,右键属性,选择配置属性下的c/c++,选择常规,把调试信息格式里的 程序数据库(/ZI)替换为 C7兼容(/Z7)
平台工具集——Visual Studio 2017 - Windows XP (v141_xp)
配置属性——C/C++——常规 调试消息格式 选择“无”
- 加密资源目录调整,比如加密了的资源目录为ResourcesAES
配置属性——调试 工作目录 内容为
1 | $(ProjectDir)..\ResourcesAES |
配置属性——生成事件——生成前事件 命令行 内容为
1 | xcopy "$(ProjectDir)..\ResourcesAES" "$(OutDir)" /D /E /I /F /Y |
配置属性——自定义生成步骤——常规 命令行 内容为
1 | if not exist "$(OutDir)" mkdir "$(OutDir)" |
- 编译出release版本
安装InstallShield2015,安装包在百度云,注册包在工具里(注册方法查看READ ME!!.txt)
使用InstallShield
http://www.pc0359.cn/downinfo/38920.html
http://www.3322.cc/soft/17722.html
新建项目
选择Windows Installer——InstallScript MSI Project——填写Project Name——OK
Application Information——填写公司等相关信息
- Installation Requirements——目前测试在Win7,Win8,Win10上成功,WinXP卡在少Normiliz.dll
- Installation Achitecture——(安装界面对话框配置)略过
- Application Files——在ProgramFilesFolder下面添加文件;Release.win32中选择全部游戏资源文件和dll,exe文件
ProgramFilesFolder这个路径就是程序安装到硬盘的路径
- Application Shortcuts——选择exe或ico文件当作开始菜单和桌面上的快捷方式
- Application Registry——注册表
- Installation Localization——勾选简体中文,否则安装路径有中文的话就会出问题
- Build Installation——勾选Single Executable
详细配置选择Installation Designer的tab页面
Installation Information——General Information——Product Code 每次升级,重新打包,只需要点击这一行右侧的“…”按钮,就会重新生成Code,安装时就会自动覆盖老版本
Application Data——Files and Folders 可以选择文件和文件夹到安装包中
文件右键——属性(Properties)
1)如果你的是.NET项目程序DLL、EXE,那就按照默认的设置,不要去改,否则出错
2)如果你的是OCX或者ActiveX等需要注册的DLL,那么选择“Self-registration”
- Application Data——Redistributables
把运行环境一起打包进程序去
目前cocos游戏在Win7,8,10需要的运行环境如下4个:
1 | Microsoft Visual C++ 2015 Update 3 Redistributable Package (x86) |
勾选这4项,并右键选择Download All Required Items…
Microsoft Visual C++ 2015 Update 3 Redistributable Package (x86)可能没有,需要下载安装InstallShield2018版;从目录C:\Program Files (x86)\InstallShield\2018\SetupPrerequisites中找到,并拷贝到C:\Program Files (x86)\InstallShield\2015\SetupPrerequisites
点击刷新页面就能看到了
- 选择菜单Build或F7打包安装包,打包到目录\PROJECT_ASSISTANT\SINGLE_EXE_IMAGE\DiskImages\DISK1中
- Win32 全屏
1 | #if (CC_TARGET_PLATFORM == CC_PLATFORM_WIN32) || (CC_TARGET_PLATFORM == CC_PLATFORM_MAC) || (CC_TARGET_PLATFORM == CC_PLATFORM_LINUX) |
- Win32 exe 的ico图标添加
创建一个名为game.ico的图标文件,网上有在线建立ico文件的网站
把game.ico文件拷贝到目录proj.win32\res替换原文件
编译出exe即可(注意有可能第一次图标并没有换,刷新或者把exe文件拷贝到其他目录就可以看到效果了)
- cocos2dx下的曲线拉抻 以及 曲线连接多点
使用:
https://segmentfault.com/a/1190000013948952?utm_source=tag-newest
源码:
https://discuss.cocos2d-x.org/t/beding-warping-sprites-by-bezier/33758/8
==更改线的颜色和透明度:参考 源代码-曲线拉抻及曲线连接多点-TexturedSpline(1).cpp==
用法是:
1 | 1.在touch事件中记录_touchPoint |
1 | void GameLayer::onDraw(const cocos2d::Mat4 &transform, bool transformUpdated) |
性能优化
cocos2d-x游戏中的性能优化和内存优化
在游戏开发的中后期所有的团队基本都会遇到两个通性问题:卡顿和崩溃。造成卡顿也就是掉帧的原因主要是CPU计算量和GPU渲染压力过大。造成程序崩溃的原因基本也是两种情况,一种是代码错误造成的崩溃,另一种是我们主要讨论的内存过高造成的崩溃。下面就对游戏中遇到的这两个问题进行讨论,讨论的游戏主要是针对2D游戏,当然很多情况是2D和3D游戏中共同存在的。
载入纹理时按照从大到小的顺序,并且分帧加载。因为cocos2dx中加载一张纹理,要占用两倍的纹理空间,多余的内存会在这帧结束时释放掉,所以从大到小,分帧加载的策略可以高效的使用内存防止内存峰值过高造成崩溃。需要注意的是避免使用超大纹理。
资源格式的选择。主要有3个因素会影响纹理内存,即纹理格式(压缩还是非压缩)、颜色深度和大小。我们可以使用PVR格式纹理减少内存使用。推荐纹理格式为pvr.ccz。纹理使用的每种颜色位数越多,图像质量越好,但是越耗内存。所以我们可以使用颜色深度为RGB4444的纹理代替RGB8888,这样内存消耗会降低一半。如果图片不需要透明通道就不要加上透明通道,这样还可以节省内存的使用。同时pvr格式的纹理在上传到gpu时的速度也要比其他格式更快一些。
减少绘制调用和上传gpu压力。首先纹理需要上传到gpu中渲染绘制,越小的纹理上传的速度越快,所以要控制避免有较大的纹理一次上传到显存中,上面说过pvr格式的纹理上传速度会快些,同时大量的纹理上传会造成程序瞬间卡顿,因为纹理上传是占用主线程的,所以第一点中的分帧加载在这里也适用。还有就是绘制的压力,同屏中显示对象的数量会影响绘制的性能,所以在合理的情况下要尽量减少显示对象的数量。同时我们要尽量将散图打到一张整图中,因为在cocos2dx引擎的底层中,在同一张纹理上的显示对象只会调用一次绘制命令,相当于BatchNode。这里需要特别注意的是减少绘制要打到整图中和为了加快纹理上传速度要减小纹理大小是个相悖的条件,所以我们要根据实际情况来衡量这两点。一般情况下每帧上传一张1024*1024的rgba8888格式的纹理是不会出现卡顿的,所以建议每次上传不要超过这个大小。如果是rgb4444的纹理那么大小会减少一半,上传会更快一些。
降低UI复杂度。降低复杂度有很多方式,第一种方式是减少显示对象数量,比如拿文本框来说,经常在游戏中会有显示金币的地方,例如:“金币:99”。有很多人在ui里会将标题和数量分开,定义两个文本框,这里如果没有特殊表现的话,就应该合并成一个文本框,这样就减少了一个对象的绘制。同理有很多东西都可以减少,例如Sprite等,项目中具体情况具体对待。第二种方式是降低UI树的复杂度,上一点中减少数量也会达到一个降低UIU树复杂度的效果,在这个同时,我们还要尽量降低UI树的深度,降低树的深度可以有效的提高绘制遍历的速度,在设计ui的时候,我们往往为了易于管理,会创建很多空面板,或节点,来达到管理ui中各个部件的作用,但是有时我们会增加的过于复杂,这里尽量降低这种复杂度就可以提高绘制效率。最后我们还要控制资源的规格,首先游戏中很多ui是通用的,比如通用的按钮,图标,面板等,我们打到一张贴图上,作为通用资源常驻内存,然后每个ui独特的资源单独打成贴图,在使用的时候加载到内存中,使用结束后释放掉。
UI设计的时候要提高UI通用资源的使用率。优化资源到最小,比如使用九宫格图片,采用旋转缩放等丰富资源表现力等。
动画文件的处理。动画一般有两种选择,帧动画和骨骼动画。帧动画的优点就是运算不耗性能,并且表现较好,缺点就是当帧数较多时,资源量比较大,并且占用内存较高,所以不太适合做过于复杂的动画,比如动作和技能较多的ARPG角色如果纯用帧动画来实现,会使用很多资源,在加载时就不能加载过多的角色,这样就局限了游戏的设计,同场景角色数量不能过多。与之相对应的就是骨骼动画,骨骼动画的特点就是节省资源,一套骨骼可以做很多套动作,新增动作也不会对文件大小有明显的增加,缺点也比较明显,就是因为骨骼动画是通过计算,然后进行旋转,位移等实现的,所以当动画比较复杂,骨骼数量较多时,计算量就会很大,对CPU的计算增加了压力,压力过大时就会掉帧卡顿。当团队技术较好,并且美术程序沟通配合默契的团队可以采用帧动画与骨骼动画相结合的方案。美术在设计时动作大部分采用骨骼,局部需要表现效果的地方使用帧动画到处的贴图来实现,美术人员在设计时要充分考虑到资源利用,利用旋转缩放功能丰富动画,同时还要考虑骨骼数量、节点深度等队性能等影响。
游戏音效的规格及优化。游戏音效在使用中也有很多问题,音效占用的资源空间、运行时内存和加载效率等。首先需要考虑使用资源的格式,在各个平台下,资源格式的支持也都不同,平台及支持的常见文件格式如下:
Android :mp3, mid, oggg, wav
iOS :mac, caf, mp3, m4a, wav
Windows : mid, mp3, wav
通常我在项目中会针对不同平台加载不通资源,一般android常用oggg,iOS中常用caf,windows下一般都是调试用的,也没怎么优化过,直接用的mp3格式。同时音效资源也需要处理,音频优化,3个因素会影响音频文件的内存使用,即音频文件数据格式、比特率及采样率。推荐使用MP3数据格式的音频文件,因为Android平台和iOS平台均支持MP3格式,此外MP3格式经过压缩和硬件加速。背景音乐文件大小应该低于800KB,最简单的方法就是减少背景音乐时间然后重复播放。音频文件采样率大约在96-128kbps为佳,比特率44kHz就够了。
游戏逻辑的相关优化。在代码中,不要在主循环中做复杂的逻辑处理,例如for循环更新、查找等,可以利用缓冲等技术,解决和优化在主循环中每帧的效能。部分不重要的逻辑,或者要求即时反馈不高的逻辑可以适当的采取抽帧,也就是不是每帧都进行运算和刷新,这样可以降低很多运算量。同时游戏的玩法逻辑也有很多可以优化的地方,比击游戏的子弹可以做缓存,减少频繁的创建和销毁对象;RPG游戏中的地图可以做成异步分块加载,不显示的可以不去加载渲染等。
代码级别的优化。这点比较简单,在编写程序时,算法最优,并且不要有内存泄漏等。
最后就是引擎级别的优化。我们使用的是cocos2dx进行的项目开发,在该引擎中,存在的bug、性能等问题也有很多可以优化的地方。在我们项目中,就修改过spine的内存泄漏问题、ui加载速度问题、还有关于对象拷贝的性能问题等。修改引擎要对引擎比较了解,并且修改后引擎的版本再次升级是还要把修改合并过去,这里也建议大家发现问题可以到引擎的Github上提交request。如果对渲染比较了解的还可以对渲染级别进行优化。
问题汇总
failed: dlopen failed: cannot locate symbol “rand” referenced by
有两种表现,有可能是编译.so文件通过,但是在老设备上运行就crash,或者还有就是编译.so文件时直接提示上面的错误信息
无论哪种解决方法都一样,请设置jni目录下Application.mk文件中增加:
APP_PLATFORM := android-19(或者更早的)因为google从android-21开始将以上那几个函数放到l.cpp文件里面去了,而之前是放在.h文件中的
而ndk和其他sdk不一样,它是向前兼容(Forwards Compatibility)的,也就是老版本兼容新版本,但新版本不兼容老版本,我们在使用jdk或者android sdk编译时总是喜欢用最新的版本编译,但是ndk编译时请使用老版本编译,其实最理想的状态是ndk的APP_PLATFORM应该等于manifest中的minSdkVersion的值
无法打开文件:“extensions/cocos-ext.h”的解决办法
选择属性中–>常规–>附加包含目录:
添加
$(EngineRoot)
$(EngineRoot)cocos
$(EngineRoot)cocos\editor-support
即可
奇葩触摸事件闪退问题
一般是因为Layer没有释放导致,不论是事件监听的Layer还是其父Layer
中文在Label中不能显示
在C++代码中写中文是无法在Label中显示的,会是乱码
解决方案:
从数据库里读中文;
或从配置文件中读中文;
打包注意
数据库要从服务器同步;自增要勾选上;好压要安装上;压缩要提前进行;
DragonBone文件名称必须唯一,否则同名文件C++导入会报错,即使在不同目录也不能重名
UI素材进行大规模替换时,需要清空debug目录,否则可能会出现图片资源显示混乱问题
替换sprite图片失效
可能是因为sprite播放ccb的timeline时设置错误,导致timeline动画冲掉了替换的图片
查查ccb文件的timeline
error C3130: 内部编译器错误: 未能将插入的代码块写入 PDB
一般出现这个错误是两个原因:
1.磁盘空间不足,
2.项目太大导致pdb文件太大,无法继续写入。
选择-项目的属性-C/C++-调试信息格式-C7 兼容 (/Z7)
安卓编译注意事项
cocos2dx的版本要和ndk的版本匹配
如:cocos2dx 3.8.1 对应 android-ndk-r10e
项目最好放在cocos2dx的目录中
build_native.py文件中ndk路径需要设置,否则会读取系统变量失败,或系统变量修改无效
ndk_root = “D:/android-ndk-r10e”
Android.mk 需要设置APP_ABI := armeabi
编译时需要删除原来编译的obj等文件
- BatchNode的使用方法,特别注意
==“GL calls”代表每一帧中OpenGL指令的调用次数。这个数字越小,程序的绘制性能就越好。==
1 | // 加载图片,将大图载入到内存中 |
- 3.15版本及以下使用SocketIO,安卓手机上出现卡死
现象:当服务器端的服务由运行状态中途关闭,正在连接中的安卓客户端如果调用重新连接方法,会卡死
原因:3.15版本及以下本身的bug,HttpClient-android.cpp文件中少了对responseCode为0时的处理
方案:升级cocos,或只升级network部分
- C3130: 编译器错误: 未能将插入的代码块写入PDB
一般出现这个错误是两个原因:一个是磁盘空间不足,另一个是项目太大导致pdb文件太大,无法继续写入。
项目属性-C++-调试信息格式(选择C7兼容/Z7)
- 如何使VS生成exe不需要msvcr100.dll
1 | 项目属性 |
- 内部编译器错误: 未能将插入的代码块写入 PDB
点击项目,右键属性,选择配置属性下的c/c++,选择常规,把调试信息格式里的 程序数据库(/ZI)替换为 C7兼容(/Z7)
出现这个问题的原因是PBD文件大小达到一个上限导致的
zi表示使用程序数据库pdb,里面有大量的调试信息,z7会把调试信息分散到obj文件中。
a